
ChatGPT Setup
ChatGPT connects to Nexus-Catalyst through a custom MCP connector. Nothing to install, and no API key — the connector uses OAuth.
Prerequisites
Section titled “Prerequisites”- ChatGPT on the web, on a Pro, Plus, Business, Enterprise, or Edu plan. Connectors are created on the web; once created they apply to your account.
- A Nexus-Catalyst account with an active subscription or trial — start a 14-day trial, or use your invitation if you have one
Step 1: Turn on Developer mode
Section titled “Step 1: Turn on Developer mode”Settings → Security and login → Developer mode.
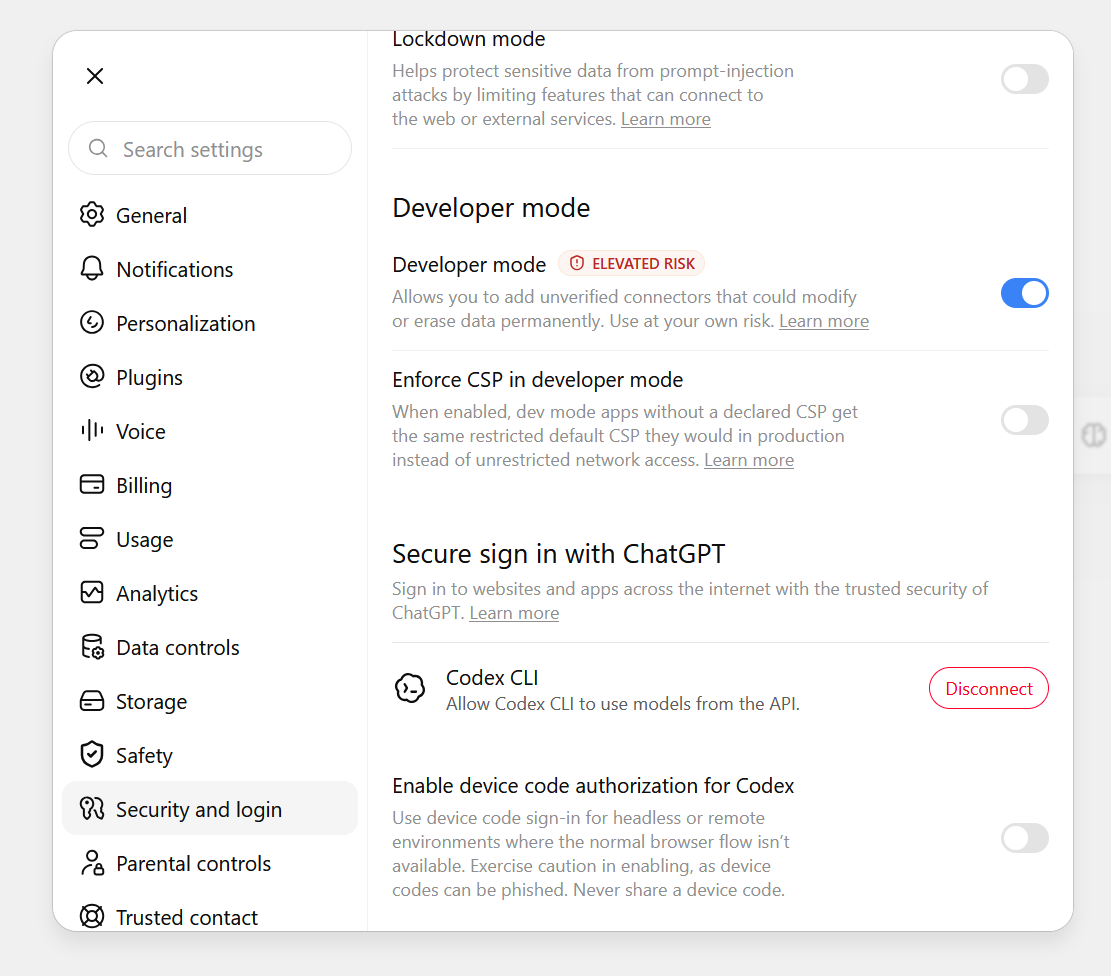
The plus button in the next step only offers a developer-mode app once this is on, so do it first.
Step 2: Create the connector
Section titled “Step 2: Create the connector”Open Plugins and press +. Give it:
- Name:
Nexus Catalyst - Description: something like “Persistent memory across AI sessions. Recall prior decisions and store new context.” — this is not decoration. ChatGPT reads the description when deciding whether to use the connector at all.
- MCP server URL:
https://mcp.nexus-catalyst.com - Authentication: OAuth
Step 3: Sign in
Section titled “Step 3: Sign in”Approve the OAuth prompt and sign in with your Nexus-Catalyst account.
Nexus-Catalyst supports dynamic client registration, so ChatGPT registers itself — there is no client ID or client secret to paste.
Step 4: Add the instruction set
Section titled “Step 4: Add the instruction set”Put the Agent instruction set in the plugin’s instructions, or in a Project’s custom instructions.
Without it ChatGPT will answer from the conversation in front of it and never call recall_context. Connecting exposes the tools; it does not create the habit.
What to expect
Section titled “What to expect”- 8 tools appear once connected. Use the plugin’s detail page to toggle individual tools off, or to refresh and pick up updated definitions from our server.
- Writes ask first. ChatGPT confirms write actions by default, so
store_contextprompts before saving. That is the intended behaviour, not a fault.
Once it is connected, Nexus Catalyst appears under Settings → Plugins:
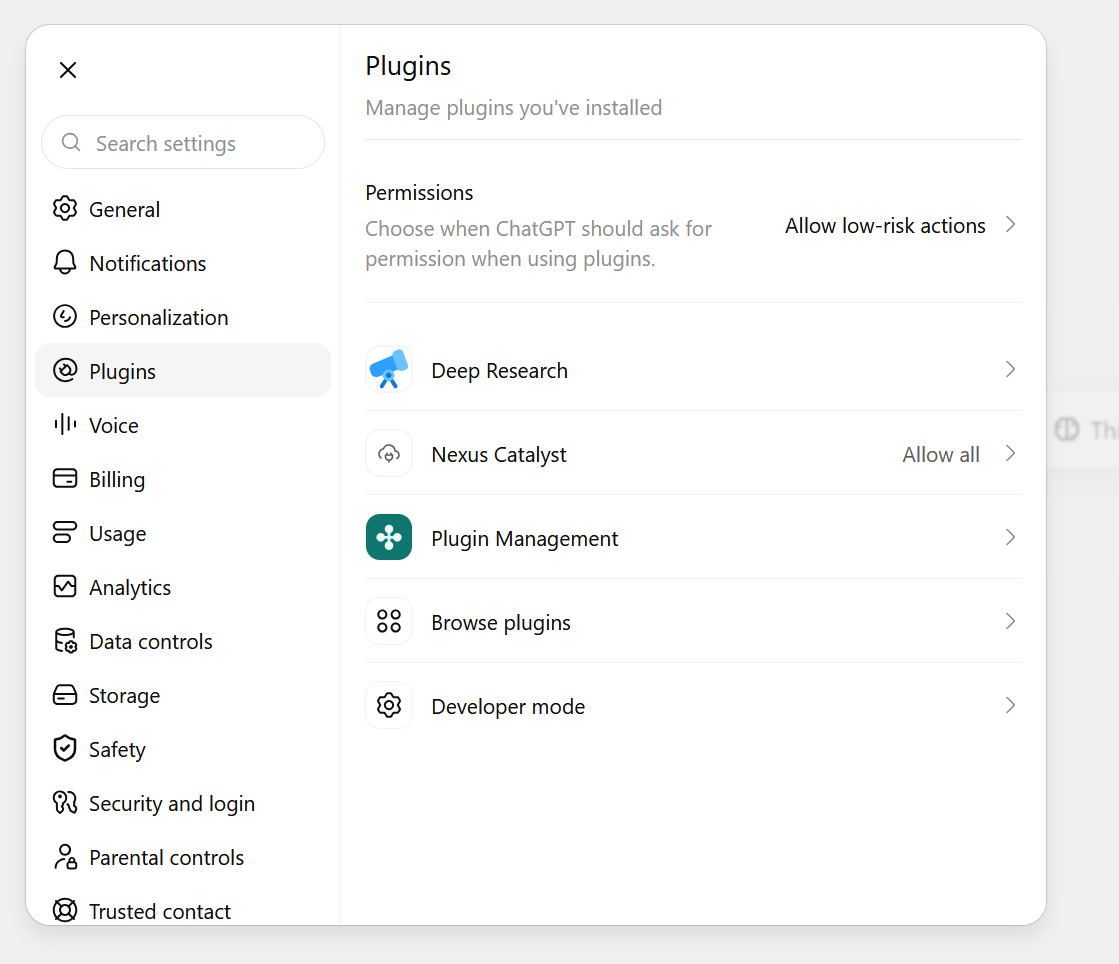
Each plugin carries its own permission setting, shown on the right of that row and
independent of the account-wide Permissions default above it. Leaving Nexus-Catalyst
on the default is the safer choice; setting it to Allow all stops the write
confirmations described above, which also means store_context saves without asking.
Troubleshooting
Section titled “Troubleshooting”The + button will not create a developer-mode app
Section titled “The + button will not create a developer-mode app”Developer mode is not on, or an admin has disabled custom connectors for the workspace. See Step 1 and the note above.
Connected, but memory never comes back
Section titled “Connected, but memory never comes back”Step 4. Confirm the instruction set is in the plugin or Project instructions.
Tools fail with 401
Section titled “Tools fail with 401”The OAuth session expired — reconnect from the plugin’s settings page.
Need help? Common Issues · support@nexus-catalyst.com